Thursday, December 22, 2011

Guest Gmail Chat in liferay Theme

Step1: If You are using gmail your chatback badge, visit http://www.google.com/talk/service/badge/New.
Or If you are using a Google Apps account, you can create a chatback badge by visiting http://www.google.com/talk/service/a/DOMAIN/badge/New where DOMAIN is the name of your domain.


Step2: Follow the Links of the page, copy HTML and paste into the webcontent source in liferay and also we could use structure and templates. Use web content display where you want the badge to be displayed. You'll know it's working if you see a large Google Talk bubble showing your current online status along with the message 'Chat with [your name]' (or whatever you selected as your badge title).


Configure/Integrate the reCaptcha in Liferay

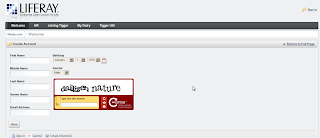
You can now easily implement a different captcha than the default captcha in Liferay. Before, the default captcha looked like this and in order to change it, you had to set some additional properties in properties-ext.properties.


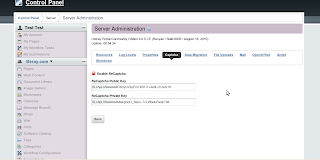
Now, you can quickly enable ReCaptcha via Control Panel-->Server Administration-->Captcha (to get a ReCaptcha key go here).
You need to login with your gmail id.
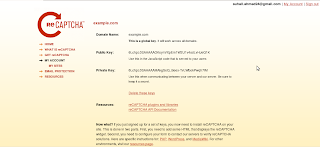
You will get this screen, copy and paste both the keys in


here as


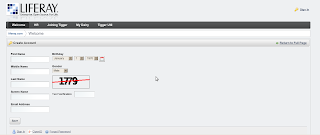
Then sign out, and go to create account. You are now using ReCaptcha!


Thanks
Suhail Ahmed 
Source(http://vforliferay.blogspot.com/2010/11/configure-or-integrate-recaptcha-in.html)

Saturday, November 5, 2011

Purposes CSS files in Liferay theme

Default theme CSS files and their purposes.

File Purpose
application.css Contains default styling having to do with components of applications. This includes the tabs, expandable trees, dialog overlays, and the results grid (that is, search container). Much of the markup for these styles is created by Liferay’s tag libraries.
base.css Contains default styling for standard HTML tags, such as paragraphs, headings,tables, and more. This file also contains styling for some Liferay-specific page elements, such as errors, warnings, tooltips, the loading animation, and more.
dockbar.css Contains default styling for the Dockbar, which floats at the top of the page when a user is logged in
custom.css A blank file that is loaded last. As a best practice, theme developers should put their custom styles here to override default styles provided by Liferay in the other theme CSS files.
forms.css Contains default styling for all form elements.
layout.css Contains default styling used by layout templates.
main.css Contains no styling, but imports the rest of the files.
navigation.css Contains default styling for the main navigation elements.
portlet.css Contains default styling for the portlet windows.

Friday, November 4, 2011

Purposes of Vm files in Liferay theme

Default theme velocity files and their purposes.

File Purpose
init_custom.vm Allows you to add custom Velocity variables.
init.vm In conjunction with VelocityVariables.java in Liferay, sets many Velocity variables that correspond to Liferay Java objects.
navigation.vm Implements the page navigation within the theme.
portal_normal.vm The overall template for all pages the theme implements. This file includes the other files.
portal_pop_up.vm The overall template for any portlets that use the Liferay pop-up custom window state.
portlet.vm The template for portlet windows within the theme.

Saturday, October 15, 2011

Structure & Template with repeatable in liferay

Sample Repeatable filed in structure and template in web content portlet.
Step 1: Create a structure click Lunch editor its open a popup window paste this code.
<root>
  <dynamic-element name='text' type='text' index-type='' repeatable='true'>
    <dynamic-element name='image' type='image_gallery' index-type='' repeatable='false'></dynamic-element>
  </dynamic-element>
</root>

Step 2: Create a Template click Lunch editor its open a popup window paste this code.
#foreach($txt in $text.getSiblings())
       #foreach($img in $txt.getChildren())
                    <img src="$img.getData()" /> &nbsp; <span>$txt.getData()</span>
       #end
#end

Step 3:Use this structure and template in web content portlet., You will find the Addadd button if you click the button the filed will repeat one. you could delete this filed as Delete click delete button to delete the filed.

Flash image Overlapping in liferay for IE and Chrome


Have you faced this problem lately where you tried to add a flash file and it overlaps in IE Browser ?
When you face a browser compatibility issues, especially the overlapping of images, you use CSS property z-index for positioning the element on top of another. It could either be an <img> tag or a simple <div> tag. But using the same doesn't work when you have a flash file running. The flash images overlap any element you have in the HTML page and cannot be tackled with Z-index. 
For example if when you use IE browsers or Google Chrome browser, the flash image overlaps the menu bar. 
You can resolve this problem by using the following method
Make the following changes in your template and then make a call from the embed tag.
<param name="wmode" value="transparent">
For example :
<object >
    <param name="movie" value="$video.data"></param>
   <param name="wmode" value="transparent"></param>
   <embed  src="$video.data"  wmode="transparent" type="application/x-shockwave-flash" allowscriptaccess="always">
</embed>
</object>
Now here's how it looks after following the above steps.

Wednesday, October 12, 2011

Details CSS in liferay Theme


By default, CSS styles in liferay can be found in folder /css. Bundle liferay with Classic theme means that css folder path: ~/tomcat-6.0.18/webapps/ROOT/html/themes/classic.

There are few css styles file. Main css (main.css) located all styling files from the lowest to highest (in term of priority) from top to bottom.

Let say, I want to add a new css file (e.g mystyle.css). I must import this file in main.css – add this new line @import url(mystyle.css); - the styles in this new file will overwrite all styles in other files above it. For a standard practice, custom.css has the highest priority.

Sometimes, new developer understood this thing but when doing some customization in custom.css nothing changes. Why? It is because the server not refers to that changes. When developer inspected the element using firebugs, the css style reference maybe main.css or base.css only. How to overcome this problem?

For development purpose only, developer must add new properties in portal-ext.properties (/webapps/ROOT/WEB-INF/classes). The properties are shows as the following.

## FOR DEVELOPMENT PURPOSE, NEED TO REMOVE
##AT PRODUCTIONS ##

## Set this property to true to load the theme's merged CSS files
##for faster loading for production.
## Set this property to false for easier debugging for development.
##You can also disable fast loading by setting the
## URL parameter "css_fast_load" to "0".

theme.css.fast.load=false

## Set this to flase to disable the display of CSS logging.

theme.images.fast.load=false

## Set this property to true to load the packed version of
##files listed in the properties "javascript.barebone.files" or

## "javascript.everything.files".

## Set this property to false for easier debugging for development.
##You can also disable fast loading by setting the
## URL parameter "js_fast_load" to "0".

javascript.fast.load=false

## Set this to true to enable the display of JavaScript logging.

javascript.log.enabled=true

## Setting it to false is useful during development if you need
##to make a lot of changes.

layout.template.cache.enabled=false

## Disable Liferay from opening a new browser window
##everytime start the server

browser.launcher.url=
##

## Last Modified

## Set this to true to check last modified date on server side CSS and

## JavaScript. On Development purpose just set it false

last.modified.check=false

## Enabling OpenOffice integration allows the
##Document Library portlet and the Wiki
##portlet to provide conversion functionality. This is tested with
## OpenOffice 2.3.x and 2.4. To start OpenOffice as a service,
##run the command:
openoffice.cache.enabled=false

## Set the Velocity resource managers. We extend the
##Velocity's default resource managers for better scalability.

velocity.engine.resource.manager.cache.enabled=false

## The cache filter will cache content. See ehcache.xml to modify the cache

## expiration time to live.

com.liferay.portal.servlet.filters.cache.CacheFilter=false

## The theme preview filter generates a preview of the currently applied

## theme that can be used by the Dreamweaver Theming plugin.
##This is disabled by default.
##Set the "themePreview" parameter to "1" in the URL to access

## the theme preview for any page. For example, a URL can be

## http://localhost:8080/web/guest?themePreview=1.

com.liferay.portal.servlet.filters.theme.ThemePreviewFilter=true

Disable border for all Portlet in liferay

liferay-look-and-feel.xml (tomcat\webapps\ROOT\WEB-INF)

Add the following setting in liferay-look-and-feel.xml for disabling border for all portlets by default.

<theme id="classic" name="classic">
       <settings>
            <setting key="portlet-setup-show-borders-default" value="false" />
        </settings>
</theme>


or

Portal-ext.properties (tomcat\webapps\ROOT\WEB-INF)

You can change it through property file also by adding this entry:

theme.portlet.decorate.default=false

Monday, October 10, 2011

Add portlets in Liferay theme Level


For Adding portlet in theme level., If we add portlet in theme it will display once our theme as selected. Here we are taking sign_in portlet.

Step1: Create your own theme and add portal_normal.vm file under /docroot/_diff/templates/portal_normal.vm.

Step2: Paste this code in header tag:
#set ($globCounterOfThemeDynamicPortletId = 1000)
#set ($locPortletId = "58_INSTANCE_" + $globCounterOfThemeDynamicPortletId)
#set ($globCounterOfThemeDynamicPortletId = $globCounterOfThemeDynamicPortletId + 1)
$theme.runtime($locPortletId, "", $velocityPortletPreferences.toString())
(Note: change your portlet Id in this line here we are taking 58 for login portlet., See all Liferay default Portlet Click Here #set ($locPortletId = "58_INSTANCE_" + $globCounterOfThemeDynamicPortletId) )


Step3: Wirte Css for your portlet in Custom.css file under /docroot/_diff/css/custom.css.

Monday, February 21, 2011

Enable OpenOffice in liferay

To enable document conversion in the Document Library portlet, follow the instructions bellow:

For Windows user


1)      Install OpenOffice.org v2.0.3 or higher (has been tested on many versions, include 3.2).
2)      Go to the folder where it was installed (for example, C:\Program Files\OpenOffice.org\program) and start OpenOffice service with the following command:
soffice -headless -accept="socket,host=127.0.0.1,port=8100;urp;" -nofirststartwizard


For Linux user
1)      Goto Openoffice installing path.From command prompt type this line
 "cd /usr/lib/openoffice/program"

  2)   Same command prompt copy & paste this code
"sudo soffice "-accept=socket,host=localhost,port=8100;urp;StarOffice.ServiceManager" -nologo -headless –nofirststartwizard"

In latest linux we need run this commend with user name ubuntu 10.4 + use this code it will ask password give your root user password..
"sudo -H -u root /usr/lib/openoffice/program/soffice "-accept=socket,host=localhost,port=8100;urp;StarOffice.ServiceManager" -nologo -headless -nofirststartwizard"


For Mac user


1)      If you are running on Mac OS X, then you should run the following from the Terminal program (note that this is assuming you are running Open Office and it is installed in your /Applications directory.
/Applications/OpenOffice.org.app/Contents/MacOS/soffice "-accept=socket,host=localhost,port=8100;urp;StarOffice.ServiceManager" -nologo -headless
In liferay GUI


2)      Go to control panel then click on the Server Administration tab, then OpenOffice tab. Click on enable, in case OpenOffice is listening to a different port change the it accordingly.

Places where this integration is used.

1)      Document Library portlet
You should see this when you View a document in Document Library, click on the desired conversion.

2)      Web content Display
You should see this when you click configuration select which are the format guest could download. Then click save button show the option to guest.

Sunday, February 20, 2011

Display hidden childs page in Liferay Footer

Step1. Add these lines into portal_normal.vm under this path your_theme/docroot/_diff/templates. (for importing bottom navigation files)
Add this inside the footer div  
#if ($has_navigation)
           #parse ("$full_templates_path/bottom_navigation.vm")
     #end
Step2. Create bottom_navigation.vm under this path  your_theme/docroot/_diff/templates
<table width="100%">
     <tr>
           <td>
                #set($layoutLocalServiceUtil = $serviceLocator.findService("com.liferay.portal.service.LayoutLocalService"))
                #set($topPublicLayouts = $layoutLocalServiceUtil.getLayouts($layout.getGroupId(),false))
                #foreach ($lay_item in $topPublicLayouts)
                     #if ($lay_item.isHidden())
                           #if ($lay_item.getFriendlyURL() == "/footer-links")
                                <div id="footer-links">
                                     #foreach ($child in $lay_item.getChildren())
                                           <a href="$company_url$child.getFriendlyURL()">$child.getName()</a>
#end   
                           </div>
                           #end
                     #end    
                #end 
          </td>
    <tr>
</table>
Note: Here we are using pages is footer links as hidden parent page, based on your requirement you need charges this line. You need put your page URL.
 #if ($lay_item.getFriendlyURL() == "/footer-links")
Step3. Add these lines into custom.css under this path your_theme/docroot/_diff/custom.css
/**************** Footer Links *******/
/**************** Based on your requirements changes colors *******/
#footer{
      border-top:1px solid #DDD;
      text-align:left;
      margin:0auto;
      max-width:960px;
      margin-top:10px;
}
#footer-linksa,#footer-linksspan {
      color:#2A72C9;
      text-decoration:none;
      font:normal12px 'Lucida Sans Unicode','Lucida Grande',Tahoma,sans-serif;
      padding:2px0px;
}

#separator{
      height:13px;
      margin:0px8px;
      padding:2px0px;
      border-right:1pxdotted #ccc;
}
#footer-linksa:hover{
      text-decoration:underline;
}
Step4. Then ant deploy fromyour theme level

Adding Google Translator in a Liferay portal

People always prefer their native language for their convence. To browse a website with a feature of tranlsation is what most of them would like. Liferay provides a feature where in we can have our portal in different languages. This is achieved using  Language-ext.properties file.

But there are few drawbacks in using the above.
The  drawbacks are :
1.This requires a customisation in all the Language_xx.properties file. (For eg. If we want 30 languages option then 30 Language_xx.properties files need to be customised).

2.Even after doing so the entire portal is not changed to the language selected,only the variables mentioned in the  Language_xx.properties file are changed and anything from database is not changed.

So here is the convenient solution of having your portal in different languages by integrating the Google's API in two simple steps

Step1:

Copy and paste the below snippet code in the "portal_normal.vm"
file
<div id="google_translate_element"></div>
<script type="text/javascript">
function googleTranslateElementInit() {
new google.
translate.TranslateElement({
pageLanguage: 'en',
layout: google.
translate.TranslateElement.InlineLayout.SIMPLE
}, 'google_translate_element');
}
</script>
<script src="//
translate.google.com/translate_a/element.js?cb=googleTranslateElementInit"></script>

Step 2:
We can further change the position of the translate tab. To change the display mode in Horizontal, change the layout to
  layout: google.translate.TranslateElement.InlineLayout.HORIZONTAL
For Bottom-right Position:    floatPosition: google.translate.TranslateElement.FloatPosition.BOTTOM_RIGHT
For Bottom-left Position:    floatPosition: google.translate.TranslateElement.FloatPosition.BOTTOM_LEFT

and so on..

To use the the Google's translator only in the selected sections of a website, we can use the below code

<script>
          function googleSectionalElementInit() {
new google.translate.SectionalElement({
sectionalNodeClassName: 'goog-trans-section',
controlNodeClassName: 'goog-trans-control',
background: '#99ff99'
}, 'google_sectional_element');
}
</script>
<script src="//translate.google.com/translate_a/element.js?cb=googleSectionalElementInit&ug=section&hl=auto"></script>

Add an element with a class name “goog-trans-section”  and a child element with class name “goog-trans-control”. On clicking the parent element, the contents within the child element will be translated.

Note: We can further customise the look and feel of the Google translator toolbar by strictly maintaining the Google trademark and logos.

The following are the merits and demerits of Liferay's translation and other translation APIs (eg. Google Translator)

Liferay's Translation

 Merits  1.Its looks professional
 2.Performance will not be affected.
 3.Translation of the content will be controlled by ourselves.

Demerits

 1.It will not translate Dynamic contents
 2.Static contents need to be mentioned in properties files manually
 3.The number of properties file increases as a number of language increases
 4.For CMS (i.e Web content and page navigations) we need to create articles in the                
respective languages seperately


Google and others Translation tools :

 Merits  1.No need of any properties file changes
 2.Dynamic content as well as static content will be translated in the respective languages
 3.For Web content and page navigations need not create articles in different languages
 4.Imlementation is easy.

De Merits
 1.Performance issue.
 2.The translation control is handled by third party
 3.We need to adhere to the terms & condition of the third party
 4.We don't have control over any issues that are caused by the third party applications .

Saturday, January 22, 2011

Messages For upgrade Browsers in Liferay

This code will be help to
Step1. Add these lines in main.js under this path your_theme/docroot/_diff/js

// java Scipt for Massage upgrade Browsers this is effect < IE7
jQuery(document).ready(function(){
if (Liferay.Browser.isIe() && Liferay.Browser.getMajorVersion() < 7) {
document.getElementById("iepop").style.display='block';
}});

Step 2. Add these lines into portal_normal.vm under this path your_theme/docroot/_diff/templates. You could changes path and name as per your requirement.

<div id="iepop" style="display:none;">
<table>
<tr>
<td>
<span>
We no longer support your browser. Use a modern browser like <br>
And also latest Version of all browser like
<a href="http://www.opera.com"><img src="$images_folder/op.png" width="20px"/></a>
<a href="http://www.safari.com"><img src="$images_folder/sf.png" width="20px"/></a>
</span>
</td>
<td>
<a href="http://www.microsoft.com/windows/internet-explorer/default.aspx"><img src="$images_folder/ie.png"/></a>
<a href="http://www.mozilla.com/en-US/"><img src="$images_folder/ff.png"/></a>
<a href="http://www.google.com/chrome"><img src="$images_folder/gc.png"/></a>
</td>
</tr>
</table>
</div>

Step 3. Add images under these path your_theme/docroot/_diff/images.

op.png
sf.png
ff.png
gc.png
ie.png

Step 4. Add these lines into custom.css under this path your_theme/docroot/_diff/css.

/************** Less Than ie6 browsers alert massage ************/
#iepop {
background:#297BCC;
height:50px;
width:100%;
}
#iepop span {
color:#FFF;
font-weight:bold;
font-size:13px;
}
#iepop span img {
width:20px;
}

Thursday, January 13, 2011

Theme and layout in liferay

Create Theme and layout in one war.

1)Create a folder under plugins\themes\your-theme\docroot (e.g layout).
2)Add all the files Under your folder (e.g layout).
a.your_layout.tpl
b.your_layout.wap.tpl
c.your_layout.png
3)Add the files of your theme directly under the docroot/WEB-INF.
a.liferay-layout-templates.xml
4)Edit the file liferay-look-and-feel.xml present in the WEB-INF directory and add the following XML fragment.
<layout-templates>
<custom>
<layout-template id=" your_layout_Id" name=" your_layout_name">
<template-path>/layout/ your_layout.tpl</template-path>
<wap-template-path>/layout/your_layout.wap.tpl</wap-template-path>
<thumbnail-path>/layout/your_layout.png</thumbnail-path>
</layout-template>
</custom>
</layout-templates>
5)Then ant deploy from your theme level.

Apply Color Schemes in Liferay Theme

Apply Color Schemes in Our Theme


The technique documented here creates a "color scheme" that has the borders turned off, but preserves the other attributes of the theme, and does so with a single CSS source set (allowing for easier maintenance). It uses a CSS design pattern known as "CSS sub-class selectors." Note that this technique can be used for more than just borders. It can be used when you have several very small variations on a single theme, and you want to keep all of those variations in a single source file.

Step1. import the color scheme css in custom.css and write css for display the color schemes div

@import url(color_schemes/blue.css);
@import url(color_schemes/red.css);

/*------------color Schemes ------------*/
.color_schemes {
position:absolute;
text-align:right;
width:100%;
margin-top:65px;
}

Step2. Then in portal_normal.vm write this code

<div class="color_schemes">
<table border="0" align="right" cellpadding="0" cellspacing="0">
<tr>
<td valign="middle" title="change theme color">
<input type="image" src="$images_folder/color_schemes/red.png" onclick="body.className=value; setCookie('bgColor',value,60);" name="theme" value="red" id="red" width="10px" height="10px">
<input type="image" src="$images_folder/color_schemes/blue.png" onclick="body.className=value; setCookie('bgColor',value,60);" name="theme" value="blue" id="blue" width="10px" height="10px">
</td>
</tr>
</table>
</div>
Step3. Then deploy from your theme